Have you ever had one of those days in the shop where absolutely nothing went right? Well today was one of those days for me. My dust collector bag sprung a leak (presumably when I went to empty it). I didn't notice it until after re-sawing a bunch of Tiger and Birdseye maple for the partitions and drawer faces. The shop air was getting thick and I couldn't figure out why. I went over to my dust collector and everything within a 5' radius was covered in fine dust. I cranked it up only to find dust spraying out of the hole. Nothing a little duct tape couldn't fix but it left the shop an absolute mess. I hate power tools.
Next up - when preparing my drawer parts I cut several pieces too small.
After that - when cutting the dovetails I (for the first time ever) cut off my tails on two of my boards instead of the pin waste (even after I marked the waste).
And after that - I cut all of the pins on the face of one of my drawers before final dimensioning the board. The board was too wide and I had to start over.
Could there be more? A few of the drawer sides curled up like a Pringle chip (seen in one of the photos).
Now you must be exaggerating right? I split the side of one of my drawers when sliding in the bottom.
And to top it off I lost several pictures I had previously uploaded so there is a gap in the progress. Oh well, I guess it's better than no shop time at all. And based on how things went today I'm not sure the pictures would have provided value anyways.
Here is one of the culprits for all the dust in the shop. I re-sawed 4/4 Birdseye and Tiger maple for the plane bays and the drawer fronts. Bringing these boards to final thickness is something I don't want to do with a hand plane. The drum sander comes in very handy
Here are a couple of shots of the plane and drawer bays. I wanted to get as much space in the plane bays as I could so I went with thin stock here. Hind sight I wish these were a little thicker. The scale just isn't right (1/4" would have been better). Oh well, they will serve the purpose. I made the thin dados about 3/4" apart from each other to allow for some flexibility in laying out each bay. This was done on the table saw. Once the final layout is decided I will line each bay with some thin carpet I picked up at the box store (or may I will leave them alone). The dividers are 1/8" thick tiger maple I had left over from a Christmas project I made for the Mrs. I was going to make them out of the matching Mahogany but thought the contrast (and match of the drawers) would be nice. The second shot shows the vertical drawer dividers installed in the stopped dados cut in a previous post. They were also made out of Tiger Maple (for the first few inches) joined with some Poplar. Also shown is one of the drawer guides for the bottom drawer. All drawers will run on these guides. And if you look close enough you can see the dust worked its way all the way over to my bench. I was blowing maple dust boogers out my nose when I finally made it inside for the night. Did I say I hate power tools.
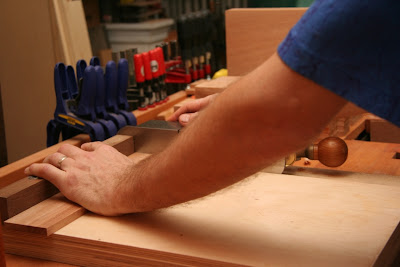
Here, I'm shooting all of the drawer parts in preparation for the joinery. The No. 9 does an admirable job here.
Pictured are most of the drawer parts (backs not shown). You can see where a few of the boards twisted on me shortly after re-sawing. I cut several extra pieces in case of a mess-up (I've already sampled from that pile). I mentioned in a previous post they will be half-blind DTs (sort of). The actual construction will consist of through dovetails with a 1/8" front veneer face to give them that half-blind look. I did this because I wanted to book match a Birdseye face across all three drawers. I will show that picture in a later post.
Here's a shot of smoothing the inside of the drawer front. This Birdseye Maple is one tough wood. I went to my Veritas BUS and it was up for the job. I don't use this plane all that often because I'm not very fond of the balance/angle/tote. Instead of pushing into the wood at say a 45-degree angle (as with a normal plane) I find myself pushing forward (not enough down). With extremely hard woods like this sometimes the plane wants to jump along the wood. I'm sure it's more my technique than the fault of the plane - I'm just not use to this style. But in the end things worked out. This wood sure did eat up the edge of the blade quickly.
Here I'm cutting the grooves for the drawer bottom of the first drawer. I love this plane (A Rob Cosman special). It makes quick work of it and is a whole lot of fun to use - perfect results every time (except when I hit the Birdseye).
Next up will be some shots of the drawers (if I don't run out of stock with all of my mishaps).


No comments:
Post a Comment