Sunday, April 24, 2011

Tool Cabinet - Part 7 - The Plane Stand (or whatever it's called)

In my limited time I managed to knock out the the plane stand.  This is a knock-off from Becksvoort's cabinet.  It isn't well executed and has a lot of flaws but it serves its purpose well.  The main reason for this 'accessory' is to house my larger planes that won't fit in the plane till below it (e.g. the LN 5 1/2 and Stanley 5) pictured.  I'm not finished dividing out the space yet - not sure what else I want to put there (maybe planes that are too small to fit in the plane till below but too large to put in drawers).  Becksvoort's design calls for small strips of leather underneath the toe of the plane.  I will probably follow his lead.

The stand is made out of Mahogany, Birdseye Maple and Poplar.  The sides are 1/2" thick with 1/4" BE Maple laminated to the Poplar.  The thin plane separator strips are also BE Maple (all leftover scraps from the drawer faces).

The height of the stand isn't arbitrary (although I almost made that mistake). It has the necessary clearance below the shelf for the handle and blade of the LN 5 1/2 when the stand is open. The depth is also calculated to make sure that when the doors close the blade clears anything that may be hanging on the door.

The inside will house miscellaneous stuff like extra plane blades, plane oils, waxes and other things I don't use that often or that don't store well in drawers.

I think my next step is a removable chisel holder that will live on one of the doors.  Unfortunately (for the tool chest sake) I just received a honey-do-list of projects my wife wants built for our 3-year old's birthday coming up.  I'm guessing the tool chest is going to take a back-seat for a few months.  I'll try to keep it alive with small accessory builds while I'm building my daughters stuff (a small stove, refrigerator, table and chairs) for her bedroom.


Saturday, April 16, 2011

Tool Cabinet - Part 6 - The Doors

Well this post focuses on the doors.  They took a lot longer than I anticipated to get them mounted.  It wasn't easy.  I mounted the hinges flush with the door and carcass. I put a shallow rabbet on both the door and carcass the thickness of the hinge using my LN 140.  Balancing the door while trying to screw in the hinge (by myself) proved difficult.  I didn't get a picture of it because I didn't have a 3rd hand to take the shot.  So, I got a picture of the finished product (oh well).  This first shot shows the overall look of the inside (so far) with the doors attached.


This second shot shows a close up of the flush mounted hinge.  I thought going with a flush mounted hinge would be a nice visual touch but it proved necessary (not just cosmetic).  Installing a 4-foot piano hinge exactly square to the sides and parallel to its edge would have been impossible (for me) without the rabbet to 'lock it in'.  You can also see the dados in the doors left over from cutting apart the carcass.  The original plan called for cutting the dados after the box was cut apart.  I decided to do it before and thought I could use the dados in the doors.  I'm regretting that decision now. Some of them will be useful but not all of them.  I will have to get creative to figure out how to use them or fill them.


Here is a shot of the outside face of the doors.  I used some faux rails and stiles to trim out the doors (to hide the rabbeted inset panel).


Here's a side shot showing the hinge and door appearance from the outside.  Overall I'm pleased with the way things turned out.  The doors are heavy but these hinges seem to be holding up well and make the doors easy to open.


Next up... I'm changing the inside design a bit.  I'm not a fan of the swinging panels on the original plan (see first post) so I'm going with a different approach.  I have 2 or 3 planes that are too long to fit in the plane bays and I don't want to put them on the top shelf (reserved for the LN #8).  I'm going with a plane stand sitting on the second shelf.  I stole the idea from Becksvoort's cabinet.  This will hold my LN 5 1/2,  Stanley 5 and a few other miscellaneous tools.

Saturday, April 9, 2011

Tool Cabinet - Part 5 - Finishing Up The Drawers

Well I'll start off by saying I did a pretty lousy job of taking pictures of the drawer build.  I usually have my son with me and he reminds me along the way.  He was off doing kids stuff so I was flying solo.  You can get the jist of what is going on but there isn't any consistency to the photos (some shots of a large drawer followed up by a shot of a smaller drawer).

This first shot is of the large middle drawer.  As with the carcass, being in the tails first camp, I start there. I ganged both the left and right sides together when marking out (and from what I remember, cutting as well).


I then move on to cutting out the pin waste in the tail boards.  I threw this in just to show off my new fret (jewlers) saw.  I absolutely love this saw.  It is super light weight and has a great design to holding and tightening the blade.  I haven't broken a blade yet (after about 6 drawers and some very hard Birdseye Maple).


After cutting out the pin waste in the tail board I mark out the pins on the drawer face.  I mentioned in a previous post that these would be half-blind dovetails.  I kind of cheated here.  I made the drawers as through dovetails and then glued on a 1/8" face to each drawer.  I wasn't really trying to avoid cutting half-blinds but instead I wanted to bookmatch the face on each drawer bay.  I resawed some Birdseye Maple and created a 1/8" thick veneer.  I then used this for the faces of the drawers. This process will be clearer as the post goes on.


Just a shot of the drawer face and two sides. I didn't get any shots of the drawer back (not sure why).


Here is where I'm gluing on the drawer face veneer.  I exhausted most of my small clamps.


After the drawer has been glued together and cleaned up I cut the grooves in the sides.  I made these cuts on the router table and cleaned up the rounded ends with a chisel and small router plane.  In the close up you can see how the veneer face creates the halfblind look.


This is a shot of the drawer runners.  They are 1/2" wide by about 11 1/2" long.  I cut oversized holes to allow for slight adjustments during the install as well as wood movement from the side boards.


Here I'm attaching the drawer slides.  I used spacers between drawers to help with consistency in spacing.  Even with these my gaps weren't perfectly consistent.


A shot of the final product. There is still some cleanup work to do but the drawers are pretty much finished.  Each drawer bay has the book-matched face that spans across all the drawers (kind of hard to tell in the photo). When I get a finish on it the matching should really stand out.

Saturday, April 2, 2011

Tool Cabinet - Part 4 - Shelves and Bays and Drawers - Oh My!

Have you ever had one of those days in the shop where absolutely nothing went right? Well today was one of those days for me.  My dust collector bag sprung a leak (presumably when I went to empty it). I didn't notice it until after re-sawing a bunch of Tiger and Birdseye maple for the partitions and drawer faces. The shop air was getting thick and I couldn't figure out why. I went over to my dust collector and everything within a 5' radius was covered in fine dust. I cranked it up only to find dust spraying out of the hole.  Nothing a little duct tape couldn't fix but it left the shop an absolute mess. I hate power tools.

Next up - when preparing my drawer parts I cut several pieces too small.

After that - when cutting the dovetails I (for the first time ever) cut off my tails on two of my boards instead of the pin waste (even after I marked the waste).

And after that - I cut all of the pins on the face of one of my drawers before final dimensioning the board. The board was too wide and I had to start over.

Could there be more?  A few of the drawer sides curled up like a Pringle chip (seen in one of the photos).

Now you must be exaggerating right?  I split the side of one of my drawers when sliding in the bottom.

And to top it off I lost several pictures I had previously uploaded so there is a gap in the progress. Oh well, I guess it's better than no shop time at all.  And based on how things went today I'm not sure the pictures would have provided value anyways.

****

Here is one of the culprits for all the dust in the shop.  I re-sawed 4/4 Birdseye and Tiger maple for the plane bays and the drawer fronts. Bringing these boards to final thickness is something I don't want to do with a hand plane. The drum sander comes in very handy


Here are a couple of shots of the plane and drawer bays.  I wanted to get as much space in the plane bays as I could so I went with thin stock here. Hind sight I wish these were a little thicker.  The scale just isn't right (1/4" would have been better).  Oh well, they will serve the purpose.  I made the thin dados about 3/4" apart from each other to allow for some flexibility in laying out each bay.  This was done on the table saw.  Once the final layout is decided I will line each bay with some thin carpet I picked up at the box store (or may I will leave them alone).  The dividers are 1/8" thick tiger maple I had left over from a Christmas project I made for the Mrs.  I was going to make them out of the matching Mahogany but thought the contrast (and match of the drawers) would be nice.  The second shot shows the vertical drawer dividers installed in the stopped dados cut in a previous post.  They were also made out of Tiger Maple (for the first few inches) joined with some Poplar. Also shown is one of the drawer guides for the bottom drawer.  All drawers will run on these guides.  And if you look close enough you can see the dust worked its way all the way over to my bench.  I was blowing maple dust boogers out my nose when I finally made it inside for the night.  Did I say I hate power tools.


Here, I'm shooting all of the drawer parts in preparation for the joinery. The No. 9 does an admirable job here.


Pictured are most of the drawer parts (backs not shown).  You can see where a few of the boards twisted on me shortly after re-sawing.  I cut several extra pieces in case of a mess-up (I've already sampled from that pile).   I mentioned in a previous post they will be half-blind DTs (sort of). The actual construction will consist of through dovetails with a 1/8" front veneer face to give them that half-blind look.  I did this because I wanted to book match a Birdseye face across all three drawers. I will show that picture in a later post.


Here's a shot of smoothing the inside of the drawer front.  This Birdseye Maple is one tough wood.  I went to my Veritas BUS and it was up for the job.  I don't use this plane all that often because I'm not very fond of the balance/angle/tote.  Instead of pushing into the wood at say a 45-degree angle (as with a normal plane) I find myself pushing forward (not enough down).  With extremely hard woods like this sometimes the plane wants to jump along the wood.  I'm sure it's more my technique than the fault of the plane - I'm just not use to this style.  But in the end things worked out. This wood sure did eat up the edge of the blade quickly.


Here I'm cutting the grooves for the drawer bottom of the first drawer.  I love this plane (A Rob Cosman special).  It makes quick work of it and is a whole lot of fun to use - perfect results every time (except when I hit the Birdseye).

Next up will be some shots of the drawers (if I don't run out of stock with all of my mishaps).

Saturday, March 26, 2011

Tool Cabinet - Part 3 - Those wascally wabbets (and dados)

The box has been put together and now it is time to put the front and back panels on. I had to created a rabbet all the way around the front and back of the carcass. This wasn't at all enjoyable. I'm not a big fan of routers (especially when not mounted in a table). The end result wasn't pretty. Fortunately this will all be covered up with faux rails and stiles.  Balancing the router on such a narrow piece was a challenge.  I made a fence to help. You can see the hamster bed being created at the bottom of the carcass.  I had already cut and installed the back before taking this picture.  Thus, the clippings were being captured inside the box.  My 2-year old daughter (at the time) saw all the dust and asked me if I was making a sandbox.  In this shot I'm cutting the front rabbets. After that the panels just drop in place and get screwed in.


After closing up the box it's time to cut the front off.  This was a challenge to say the least. Keeping things up against the fence proved difficult.  I put some feather boards on the saw but the box was too much for them.  My 12-year old son was on the outfeed side of the table saw ready to catch it.  I started by slicing the top and bottom all the way through.  Once those cuts are made I stuck some boards ove the cuts I just made using double-sided tape. (note to self - don't buy anymore tape from Big Lots).  This holds the box together so when you cut the sides things don't fall apart. The third side cut easily. The fourth - well - buy better tape next time (or use a glue gun).


After the front face has been cut off the edges need to be cleaned up. I then cut the front face in two to form the two doors.  Unfortunately I didn't get a picture of that but you get the idea.


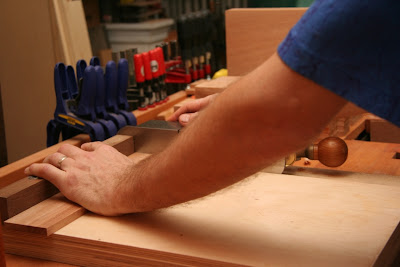
The doors have been put aside while work gets done on the inside. There will be three columns for drawers at the bottom (the original plan has two).  I added a narrow/tall middle drawer to hold my glue bottles and oil cans.  In this shot I'm cutting stopped dados to receive the vertical dividers for the drawers. The shelf above the drawers will receive the same stop dados on the underside.  You start by marking your location and scribing lines with a knife. Then it's simply a matter of sawing down to the required depth. I just clamped an 8/4 piece of maple scrap (cutting board leftover) on the line and using my x-cut saw (Bad Axe Gloat!) sawed away.  (Update:  I've since realized that cutting stopped dados by hand isn't all that intuative.  I will vlog my approach at a future date.


After the outsides of the dados have been formed it's time to clean out the waste.  There is no better way to do that than with a router plane. That's got to be one of my favorite tools.  I chiseled out the waste at the stop portion of the dado down to depth to prevent blowing out the edge with the router plane. This shot is taken from the back.


You've gotta love it when you can get cross grain curls like this with a router plane.


The dados are cut a tad bit narrow so you can sneak up on them with the side rabbet plane.


Next up - I spent the day dimensioning the lumber for the shelves and drawers. There will be a total of 7 drawers (mahogany sides and birdseye maple fronts. I'll be using half-blinds on the drawers (sort of). Things are going slowly right now because I'm finishing the inside of the cabinet in the process. I am no finisher that's for sure.

Saturday, March 19, 2011

Tool Cabinet - Part 2b - More dovetails galore!

I start the long and tedious work of banging out the waste between the tails.  I've never been accused of being all that quick at the bench but holy smokes. I was worn out at the end.  I had to go back to the stones several times when all was said and done.


I finally got the waste on the tail boards cleaned out. This is the setup for marking the pins. This is where the 140 trick really earns its keep. It made this setup sooo much easier. I just slid the tail board up until it locked into the edge of the pin board.  I then clamped it down to the bench. The box of my Lie-Nielsen No. 8 (pictured under the tail board at the back of the bench) was almost the perfect height for supporting the board. Lesson learned - always keep your LN boxes.


I skipped the boring details of documenting the pin cutting/chiseling.  It's pretty much the same as the tails.  So now... the long awaited final product. I forgot to take pictures during the assembly process. That was interesting to say the least.  As I mentioned earlier I'm a Cosman graduate so I was taught - no test fitting.  Boy was I nervous.  I didn't want to spend 1/2 day cutting out the tails/pins and then I get a massive split during assembly.  I bought some Titebond Extend just for this assembly. It worked out well. It's a bit runnier than anticipated but saved my hide in the end. When you are gluing up this many pins/tails you need as much open time as you can get (and I don't have any hide glue).

I'm satisfied with the results - there are a few small cracks here and there but overall things went together well - no blowouts or splits at the sides.  


Next up I will be cutting this huge box apart to form the doors. Unfortunately I took the above picture of the finish product after I cut the doors off.  That is why you don't see the two half pins next to each other.

Saturday, March 12, 2011

Tool Cabinet - Part 2 - Dovetails galore!

I've never done a dovetail carcass this large so I'm open to ALL suggestions and comments on my approach.  This is where my standard European woodworking bench shows it's shortcomings.  Clamping wide boards like this proves difficult.  On my short list to build is a Joseph Moxon Double-screw vice.  Or better yet, a Roubo Workbench.

I'm in the tails first camp.  Is that the Hatfields or the McCoys?  Oh, it doesn't matter, it's the right camp.  I don't usually do so but I created a story stick for laying out the tails. I did this because when the box is completely assembled I will be cutting it in half (so to speak) to form the doors. Thus, I created two half pins and a 1/8" saw kerf near the front of the box - you can see that in the first picture. I ganged both sides together so I could mark them at the same time (something else I don't usually do).


Here I'm just marking out the tails with dividers. I could have just projected the lines from the story stick but I like the divider holes in the endgrain so that when I pull off the story stick I can place my pen in the holes and using my dovetail marker mark the top and side of the tail at the same time.  I've adopted the Rob Cosman approach to dovetailing.  He is a superb teacher and following his step-by-step method makes this whole process seem a bit like cheating.


I threw this one in to show the scale of the sides. This sucka huge.  You can also see the drawers that I'm replacing with this cabinet behind the boards.  I actually had to get in one of these drawers after clamping all of this up.


All tails on both boards (top and bottom) have been marked out. I was taught to completely mark out your waste to avoid cutting mistakes. It takes a little longer but has never failed me yet (to this point anyways).


There is no great revelation in this picture but I wanted to throw it in so I can justify the quality of the final product.  It was very difficult to get in a good cutting posture with the boards as tall as they were. This isn't as important when cutting the tails. If you go off your line on the face of the board a little it isn't a big deal. However, when cutting the pins it sure was a challenge.


Here I'm just cutting out the waste with a fret saw. My saw was being difficult that day - I snapped 4 blades cutting out the pins and tails. I think in all of the dovetail work I've done in the last few years I may have broke two blades. I suspect they were getting hot because most of them snapped when I got near the last few tails/pins. Also, I was getting tired near the end and think I was rushing the cuts and putting too much pressure on the saw. Update:  I've since upgrade my fret saw to the Knew Concepts Saw.  What an absolute treat that saw is to use.


More to come on the dovetails.  My hands are cramping from all the sawing