Anyways, I thought I would document my journey on making a tool cabinet for some of my hand tools. I'm making a modified version of a plan I found on Fine Woodworking. Most of my hand tools currently live in drawers under my bench. Initially, I thought this was a good idea but after building and using them they are rather inconvenient. I can't use my holdfasts and can guarantee I will need to get in a drawer just as soon as I have a large panel clamped up in the perfect position to mark some pins (happened as I was making this cabinet).
So, like I said, I'm making a modified version of this tool chest found on Fine Woodworking.
My drawer layout will be different and I won't have the internal door partitions. That is a bit cluttered for my tastes. Instead I'll be adding a smaller version of this plane cabinet found on Becksvoort's cabinet. This will hold the longer planes that won't fit in the cubby holes (a Stanley No. 5 Type 11, a Lie-Nielsen No. 5 1/2, etc.)
So the work begins. I decided to make the cabinet out of some African Mahogany I purchased some time back for a blanket chest I was going to make for the Mrs. There was a change of plans on the chest (using Walnut now) so the mahogany has been sitting in my shop (read garage) for a few years. I'm not really a big fan of some of the mahogany knock-offs (difficult to work with hand tools) so the wood is turning into shop furniture (albeit expensive shop furniture).
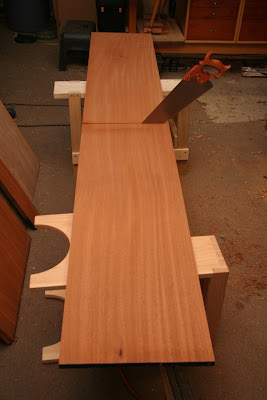
For the sides, top and bottom I have two 17" W x 8'L boards. The rough dimensions of the box are 37"W x 48"T x 16"D. In this photo I'm cutting one of the 8'L boards in half for the sides.
The box will be joined together with through dovetails all around (tails on the sides). So, once all the edges have been straightened and squared (I did the cross-cut squaring on my TS - they are a bit too wide for the shooting board) I put a shallow rabbet on the inside faces of my sides (tail boards) - AKA the 140 trick. You've gotta love the cross-grain shavings you can get with a 140. This will later simplify registering the tails on the pin boards when marking.
The next post will document laying out and cutting the dovetails. There are a lot of them so this will be great practice for some hand-cut dovetails.


No comments:
Post a Comment